This classic tale of witchcraft is the most beautiful horror film I have ever seen. A young American woman Suzy Bannion (Jessica Harper) is accepted to a prestigious dance academy in Germany only to find it is a meeting place for a coven of witches. Based on the essays of Thomas Dequincy’s Suspiria de Profundiis. Director Dario Argento takes the first three essays of “The three mothers,” about ancient and powerful witches who live in various places of the world to spread their evil to create a film like no other. It is like a live-action Disney horror film of brilliant reds, green and blues filling the screen. A voice-over sets the uneasy tone of the film as he tells you over a black screen that Suzy Bannion has taken a plane from New York City to attend an exclusive dance academy in Germany. Suzy Bannion arrives at the airport and steps out into a driving rainstorm to hail a taxi. A cab arrives and there is a language barrier. Suzy shows the driver the schools brochure and she is off to the academy. She arrives at the academy to find a young woman at the doorway, screaming at someone inside. She hears pieces of the conversation, which become a helpful clue after the girl is murdered. The killer chases the girl through a dark forest until she arrives at a friend’s house. The friend tries to calm her down and leaves the girl to meet her death. Suzy immediately notices everyone at the academy look likecharacters from a dark Brothers Grim fairytale. The tall, gangly students are represented in stark angry colored lights. The ballet instructor is dressed all in black. The head mistress is a serious looking woman with bright painted red lips. The servant is a hunchback deaf-mute servant, and the Russian head cook is a knife-wielding lunatic. Suzy falls deeper into the threat of the coven when she suffers a nosebleed in ballet class causing her to collapse. The cause of the nosebleed is explained as a mild internal hemorrhage. Soft blues and pinkish reds represent Suzy, as she seems to float on air when she walks. Her discovery of the secret is handled in a sleep-like haze with red twinkling lights following her as she runs from the dying queen witch in the end. Scary and gory in 1977, the film looks fake and silly by today’s standards. The blood and gore looks like bright melted red crayons or wax. A scene stands out where a student is chased into a room full of piano wire, which doesn’t cut her as she thrashes around in the middle of it. The effect looks as if a giant slinky is attacking her. The film, despite all this is still a lot of fun to see with your friends on a Saturday night with the lights off and lots of popcorn. Digitally re-mastered. Rated R.
Wednesday, March 16, 2011
Suspiria- a Film Between Dreamlike Imagery and Exploitative Shock
Art Box: A Great Way to Get Creative with Children
You've had it! If you hear, "I'm bored. What can I do? There's nothing to do!" or one more whine you'll surely put your head in the dryer and slam the door shut! Keeping kids occupied challenges the most stalwart of adults. Let's face it; we're no match for the leprechaun like stealth of the half-pint human who exhibits no shame while in pursuit of getting what they want. In this case, the want is something to do! Take a deep breath and grab the art box. Aren't you glad you planned for just this kind of rainy, I'm bored day?
The art box is alive with fun projects for little fingers and minds. The key to creating this mother's little helper is to keep it fresh and growing. First you'll need a box. Find a fascinating box, either plastic, heavy cardboard, or a Rubbermaid container. Make sure it's colorful, big and fun. After all, this is a special box, not you're ordinary run of the mill type of box filled with just paper and crayons. The art box I pulled together is a plastic one in primary colors of red, blue and yellow with a snap on lid and a carrying handle. It cost about $5.00 at a big box store.
Once you've found the perfect box you can begin filling it. There's no need to fill it all at once. The idea is to start with the basics: construction paper in lots of colors, crayons, markers, scissors, glue, and a sketchpad. These items can be varied depending on the age of the child. Washable markers are a good idea for the younger set along with small, scissors with rounded ends. Add to the box periodically so when it's opened there's something new inside. Play dough makes a great addition. Forget the molds and the fancy tools. Let the children just use their hands and imagination to create whimsical masterpieces. Toss in stickers from time to time, especially for upcoming holidays. Paints of all kinds can be added. Start with watercolors. Move on to tempra for the older kids, but always have finger paints for the little ones. Sidewalk chalk is a big hit in the summer and in the winter it can be used on large newspaper print. You can usually get the end rolls free or for a nominal fee from newspaper publishers.
Think out of the "box" when coming up with new ideas. Collect little treasures when out walking. Botanicals like small pinecones, straw flowers, dried grasses or try your hand at pressing flowers with your wee ones. These can be glued on to paper to make wonderful nature pictures. Tiny shells and sea glass collected from a trip to the beach will surprise and delight when the box is opened. Glitter, pieces of fabric in bright colors, ribbons and rickrack all get the creative juices flowing. At some point you'll want to add colored pencils, stencils, and a handy dandy ruler. A compass or protractor for the older children will acquaint them with these items as well as aid in the artful creativity that makes children everywhere smile. (At least for a while.)
Keep a look out for unusual items that you can add to the art box. Purchase various colors of tissue paper for paper flowers and roses or to be used in whatever way your child comes up with. Petal paper is a very special paper that is made with bits and pieces of flower petals, grasses and other gifts from nature. It's a bit pricey, but what a treat for the older children.
The more fascinating the items the children find in the box, the more special it becomes. Look around your home. You'll find items that make for interesting art projects like: cotton balls, colorful pastas, sponges, buttons of every size and hue, dryer lint (?) I was just kidding on that one. Keep a good supply of stickers of all kinds on hand to add when nothing else is available
The true key to the "special" box is to have little surprises inside that were not there the last time it was brought down from it's safe spot. This is not the everyday color jar filled with broken bits of crayons; this box is brought out when things become really dire. It's a "special" art box. The special box is only used at the table or easel. No preschoolers are allowed to take one item from the box and walk around with it. Again, the idea is to make it so special that it brings excitement and smiles to the faces of the bored and fretting. It's worked for me and I'm sure it will work for you as well. So get crackin' you never know when the clouds might appear on the horizon or your child's face. As adults, we seriously need all the help we can get. The special art box will give you a moment or if you're lucky, two or three to take a deep cleansing breath. Just look at their cherubic faces. "NOOO don't paint the cat!!!"
The Creation of Art is Subjective

credit
The Creation of Art: A Review
The Creation of Art: New Essays in Philosophical Aesthetics edited by Berys Gaut and Paisley Livingston is a great book. As a person who loves art, I was excited to read a book dealing with art from a philosophical perspective. I was particularity impressed with the essays talking about genius and creativity. Therefore, these essays will be the focus of my review.
According to Guyer, genius is a gift for invention. This gift leads to originality in representation (Guyer116). He also claims that what the genius does is that he uses art to represent the freshness of nature (Guyer122). By stating this, I believe that he wishes us to see that when the genius uses nature as his canvas he wants whatever he paints or sculpts to be as fresh as the outdoors themselves.
I agree with Guyer's definition of genius. A genius doesn't just make a copy of what he sees in nature. Anyone with a small amount of artistic talent could do that. A genius seems to be able to take what he sees and shape it in such a way as to make it his or her own. For example, an artistic genius might paint a rose blue instead of red or pink. A statue may be sculpted out of gingerbread cookies instead of clay. A poem can describe the sunset as ‘rainbow sherbet melting in the sky'. Artistic genius seems to spark imagination. I also enjoyed the way he described Kant's view of what a successful work of art entails. A piece of artwork qualifies as a success when it brings human beings pleasure because its form and content starts a free play with our imagination and understanding (Guyer 127). This makes sense because some of the poetry that I write is inspired by what Kant calls ‘successful artwork'. For example, the first time I saw Van Gough's "Starry Night", I wrote a poem entitled "Imagine the Night Sky."
I also like the fact that Cohen states that human beings who appreciate fine art must posses a bit a genius (Cohen 145). This is because it seems that we are geniuses when we can appreciate Shakespeare or Van Gough. It seems that being a genius isn't ass hard as first appears. It seems that all it takes to be a genius is the ability to change the ordinary or the ability to appreciate the extraordinary. However, it is unclear what it takes to be an appreciator of fine art or to have something labeled an appreciator of fine art. It is also unclear how much an artist must change something to be called a genius. Therefore, being labeled a genius isn't a clear cut decision. In other words, many factors may play a part in being labeled a genius.
Olsen does good job talking about creativity. I like the way that he uses Shakespeare to describe what poets do. Shakespeare claims that a poet's pen "gives to an airy nothing a place and a name" (Olsen 192). This description reminds me of Plato. According to Plato, the Muses are vital to poets: "If anyone comes to the gates of poetry and expects to become an adequate poet by acquiring expert knowledge of the subject without the Muses' madness, he will fail" (Phdr 245a). The Muses seem to help the poet's pen give life to nothing.
The discussion of the creative personality is provocative. Creative people may have non-conventional thoughts. This may be due to a need to resist being mainstreamed on society. A creative person wishes to give into his or her own unique nature (Olsen 196). I think that a creative person can have a unique nature and still create a painting, poem, or short story using a very structured regimen. In other words, creativity doesn't have to give way to convention and structure. One thing that a creative person might create is a fictional character. However, many philosophers have argued that fictional characters can't be created. I don't agree with the idea that fictional characters have no reality at all. It makes more sense to believe that fictional characters come into being only because of the mental and physical acts of an author. Because of this, fictional characters have become part of most cultures.
While most of this book was informative and interesting, one essay that I read was boring. The essay deals with the origins of creativity. The explanations of the origins of creativity are cognitive, biological, and social. The argument seems to be that creativity comes from all three sources. This comes as no surprise to me. In addition, the biological portion of the essay was a bit confusing.
This book is worth reading because it stimulates and educates readers. Also, it has put art in a new perspective for me. For the most part, people will not need a background in art to understand and enjoy this book; therefore, I recommend this book.
1
Sunday, February 27, 2011
Photography Tips and Tricks

Photo Credit: celtics baby clothes
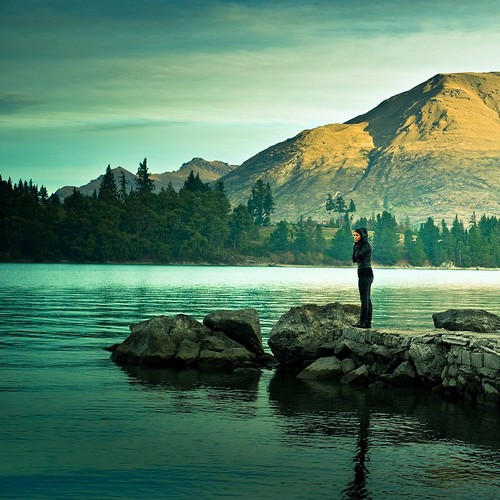
Photography isn't just about making memories, it's about art. Be artistic. Here are a few tips and tricks to help you make those photos, picture perfect.
To make those dull photos turn into works of art, consider these questions:
Decide if you want the full subject, half, or even a close up. How much background do you want, or even foreground? Exactly how close do you want that close up? What details do you want to focus on? Do you want a vertical, horizontal, or tilted photograph? What angle do you want? What's the best lighting? What background do you want to use?
1. Placing the subject of interest. Choose how much of the subject you want photographed. (Example: you want full body, half body, or face shot.) If your subject fills the frame then it's okay to center it. If you are trying to get more of the background, try placing your subject to the right or left in the viewfinder. With a horizontal (laying down), try to place them at the top for more foreground, or at the bottom for more background. And you could even tilt the camera for a more funky picture. It all depends on what part of the scenery you want visible in the picture. Maybe you want that tree to your left and your subject to the right. Or the patch of flowers in front and the mountains in back. (I find it best to take my time and take shots of each possible way and several different poses. This way I know I'll find the best photograph with the most potential.)
2. Don't center. The circle, plus sign, or brackets in the middle of your viewfinder is for focusing and isn't necessarily for centering the subject. Placing your subject in t he circle could leave you with a lot of empty and useless space on your photograph. Too much background and not enough subject. If your subject fills the frame then it is okay to center them. (Sometimes you just have to ignore the focus points and concentrate on your subjects placement in the frame instead.)
3. Camera angles. Walk around the subject, shoot from all angles and sides. This will help you to get the best lighting, background, and different aspects of the subject. You will want to find the best angle for all three. Pick a background that will not distract your viewers from the subject of interest. (I choose my backgrounds to where there's not much clutter. Sometimes I will use a plain sheet or blanket and place it behind the subject, but making sure it does not clash or blend.)
4. Reflectors. In some situations you just can't get enough light or you perhaps you just want more. To use a light reflector, place it in a position where it reflects light onto the subject without it getting in the frame. Use this if your shot is coming out too dark or there are too many shadows. On night shots that you need more than your flash can put out, place a lamp (or several) near your subject, but out of sight, and use the light reflectors to bounce from the lamps to where needed. (Some homemade light reflectors can be real cheap to make. You could use white cardboard, or if you can't find this, then simply take any piece and paint it white. For more light, place tin foil over your piece of cardboard, smooth it out, and reflect where needed.)
5. Shading. Using the same piece of cardboard as mentioned above, you can use this to block the light as well. You could make this easier by painting one side white and the other black. Or just place the piece in front of the lamp or sun to dismiss light from your subject. On most cameras you can use a sunshade for the lens, some cameras come with this, some you buy separate. This won't keep light from your subject, but it will block the light from causing a flare effect on the outcome of your photograph. The sunshade just clicks into place around your lens, and keeps the lens safe from any glaring.
6. Outside daylight. Direct sunlight is when you place the sun behind the camera, but in front of the subject. Using direct sunlight can cause shadows on the subjects face and possibly their eyes squinting. Back light is when the sun is behind the subject and in front of the camera. This will lighten the photo and cause much softer features on the subject.
7. Preventing red eye. Red eye is caused when the flash is too close to the lens. Ways to prevent this are: Attach a larger flash to your camera, t his way the flash is further from the lens. Or if buying a camera, look for one with the flash located far from the lens. Try getting closer to your subject when needing the flash. (Before I bought my camera with built in red eye correction, I had to use a photo editing program to correct these problems. I was even scanning my pictures and still having to edit when I was using my film camera that was hopeless against red eye.)
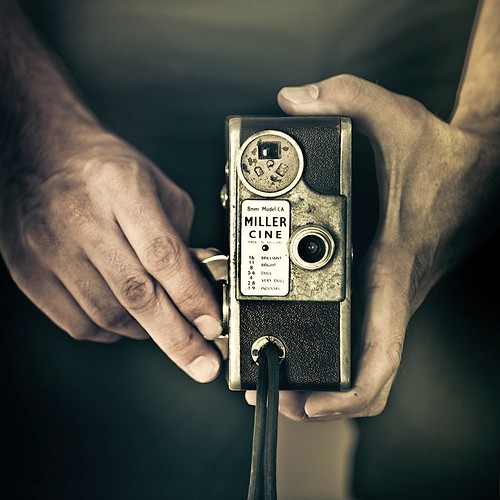
Baby Photos and the Art of Photography

photo source
"Seize the Moment" This is one of my favorite sayings. How often do we take advantage of the MOMENT? The moment is instantaneous. What happens right now will not happen again, ever! Will you remember the moment?
Photography is the art of capturing an image of that moment. It could be a face, a plant or a mountain. It could be something that will be there tomorrow but will look different or it could be something that won't be seen again. I read in a comic book once of a conversation between a father and son. The young son asked his father why old photos were always in black and white and new photos were in color? His father said there was always color film in the old days, but the world was only in black and white then! It was funny but some of our most famous photography "artist" worked in black and white such as Ansel Adams. He and so many others were artists that couldn't make up their work but had to capture it at the right instant of time.
I was going through some photos with my wife the other day. Some of them would take my breath away. They were images captured in time of babies in our family. Some of these babies are now 5, 8, 10, 14, 17 years of age. They are my children, nephews and nieces. Some of them are of my wife and her sisters. They're baby pictures! They are an instant caught in time. They were either taken by my in-laws or given to them as gifts. They may not have been present at the time the photo was taken but they had that image of that instant in time to carry with them until they died. These images were no different than the images that Ansel Adams gave me as a gift when he photographed San Francisco bay where the Golden Gate Bridge is before it was built. He gave me a memory that I could not have had otherwise. My family and my sister-in-laws' families gave my mother -in-law and father-in-law memories that they would never have had if it weren't for photography.
Even if you aren't a great photographer, a picture is still worth a 1,000 words. When a newborn baby comes home from the hospital and the family and extended family come by to see him or her, what comes out? Of course, the cameras come out and start snapping. I learned two schools of thought from photographers that I took courses from. One was in a roll of 36 exposures, 34 better be the top quality photos that you intend to sell. The other photographer taught that in a roll of 36 exposures, expect 2-3 quality photos that are worthy of selling. What I learned from this is spend your time taking posed photos but keep snapping for candid photos.
If you are taking photos of babies or children, take your time for both types of photos. I personally do not like posed photography but that's me. I prefer to capture a child that is at play trying to solve a problem or just being natural. I like the expressions when they are deep in thought or interacting with other children. I found a photo of my son that I took through a car window when he was five holding his hand up with his fingers stretched out. That photo is so memorable to me because I sent it to my mother before she passed away. It was exactly the same photo that my mother took of me when I was five years old.
May I suggest that you seriously consider studying photography to get a better understanding of the capabilities of using a camera properly? If you are just starting out, you need to start with the basics and work from there. Here is a good site to learn various aspects of photography from: http://www.photographytips.com/ For some detailed photography, study someone like Ansel Adams and look at this website: http://www.anseladams.com/
Saturday, February 26, 2011
Christmas Photography Tips and Advice
credit,photo credit
For Christmas photography tips, or any sort of photography, we want the best results to come from our time and effort. Christmas photography captures special moments, especially when children are involved. In fact, this leads to my first Christmas photography tip:
(1) Focus on the children first. This admittedly is a bias of mine, but Christmas foremost should be a children's holiday. This applies to gift-giving, and also to photography. If you disagree and/or if adults are at the center of your Christmas, fine, that's just my opinion. Just think of ol' Art Linkletter: "Kids Say the Funniest Things." Kids also make the best photo subjects, and regardless, Christmas (like Trix cereal) is for Kids.
Our Top Ten Christmas photography tips are going to relate to the strategy of taking the best photos, not to the type of camera. That's a whole 'nuther topic. In fact, yours truly is not even a shutterbug. My advice comes from working as a local daily newspaper reporter, among some of the best professional photographers, going back to the 1970s when they still used darkrooms, up to today in the digital age. These Christmas photography tips are geared toward how you interact with your subjects, once the camera is chosen and the lighting adjustments are made.
(2) Don't be one of these photographers who is constantly out front and interrupting things, asking people to pose. For your best Christmas photography, be the fly on the wall. Stay in the background and take candid photos of what's happening, photos in which the subjects don't realize you're taking their photos.
(3) A lower angle (shooting "upward" toward the subjects and the scene) often yields better results. Don't hesitate to sprawl on the floor.
(4) In your Christmas photography, look for sequences of events. A photo is just one moment in time and to capture a sequence, many folks nowadays prefer a video camera. Still, there's nothing like a series of photos. For example: (A) Child awaits anxiously for gift-giving to begin. (B) Child receives wrapped gift. ( C ) Child tears wrapping off of gift. (D) Child reacts to gift.
(5) In fact, your sequence of events could begin hours earlier. Child helps decorate tree. Child puts on Christmas outfit. Etc.
(6) Just because you're staying out of the spotlight with your camera, that doesn't mean you can't be persistent. Patience is a virtue in waiting for just the right moment, just the right shot.
(7) Be a minimalist. Don't try to illustrate the whole scene of the Christmas event at once. If it's a party, take turns focusing on individual participants, or no more than two or three in one frame. If your Christmas photography involves a group of carolers, go ahead and photograph the whole group, but also aim for closeups of one caroler, or a small group.
(8) If you still want some posed Christmas photography for the archives, that's fine. Try to do the posing at the conclusion of the shindig, not at the start or during the middle.
(9) For posed photos, try to keep the number of subjects small. Let's imagine the group of Christmas revelers is 20. Go ahead and shoot the group of 20, but keep in mind that with so many folks in there, their faces are going to be the sizes of dimes. Also shoot "subgroups" with three, four, five people.
(10) When people pose in groups, have them put their heads as close together as possible. This may seem like a minor point, but when you see the results, you'll understand. Faces can be 20 percent larger and up close if we eliminate the wasted space between their heads.
SOURCES
Personal experience
http://digital-photography-school.com/16-christmas-photography-tips
http://www.best-family-photography-tips.com/Christmas-pictures.html
http://photography.about.com/od/christmas/Christmas_Photography.htm
Stephanie Harrison Photography - Where You'll Find the Best Photographer in Town
credit
Whether you're looking for that perfect photographer for senior pictures, wedding photos, new baby celebration or special family moments, Stephanie Harrison Photography is the place to go! You'll not only find a professional studio that is conveniently located in the heart of the Historic Depot District in Richmond, Indiana, but you'll meet one of the friendliest, easy going photographers around; not to mention at a great value!
The photographer at Stephanie Harrison Photographer, none other than Stephanie Harrison herself, offers an artistic style that can't be found elsewhere. The results of her work give an eclectic, non-staged, and real feeling. She captures expressions and movements perfectly in her photographs. She's got the perfect personality for children and adults alike. She can accommodate any situation from serious, quiet moments to doing whatever is needed to get an unsure baby to smile, make nervous folks feel comfortable or even catch that wondering gaze of a beloved pet.
Photos aren't always taken inside the studio at Stephanie Harrison Photography. The opportunity is also there to go outdoors and use the resources of the Historic Depot for a more urban look, combining the exposed brick of old buildings with the sweet, fresh face of a new baby, for example. Stephanie is also often available for on-site shoots for weddings, special celebrations and other purposes!
Stephanie Harrison has the experience to make your photo shoot the best it can be! She's been featured in a number of magazines across the world and has won various photography awards. With such skill and recognition one might think her prices would reflect it, but at Stephanie Harrison Photography, the value is unreal!
The session fee is a very reasonable $40.00 for up to four people. Prices for prints obviously vary by size but range anywhere from $8.00 for eight wallets up to $90.00 for a huge 20x30 print! She offers packages for senior pictures starting at a low $99.00 and Wedding Packages that can be had from $550.00. Also available are Gallery Canvas Wraps in various sizes which are, simply put, awesome!
Stephanie Harrison Photography can be found at 195 Fort Wayne Avenue in Richmond, Indiana and reached at (765)962-3133. The website, www.stephanieharrisonphotography.com offers numerous examples of Stephanie's work, a price sheet, bio, and contact information for setting up your first session.
Stephanie Harrison Photography; you simply won't find a better photographer around!